 @H5mag
Area overview
Your H5mag article is built up using areas, the basic building blocks of your online magazine.
- Adding new areas and sections
- Area options
- Free positioning / in flow
- Area tree
- Snippets
- Common areas
- Advanced areas
Adding new areas and sections
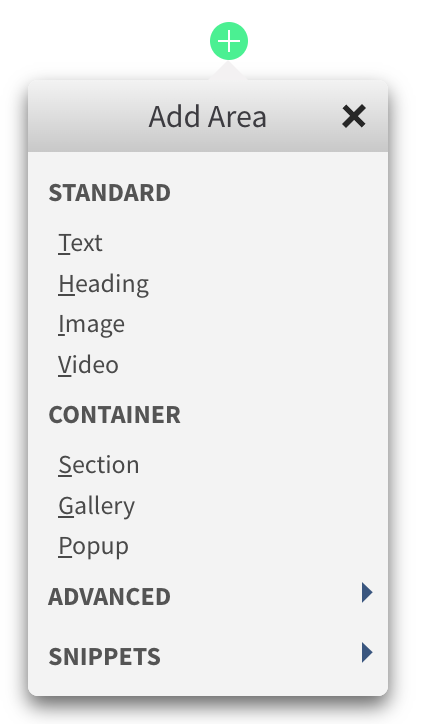
To add new areas and sections, simply click on an empty space on the artboard. This will cause the "add" button to appear in the bottom right corner of the screen. Click on it to select the type of area you want to add. If you want to add multiple areas in one place, choose "section", and then add the areas to this section using the same method.
Alternatively, you can add a new area directly in the Area Tree by clicking on the plus button next to the article area at the top of the screen.
Area options
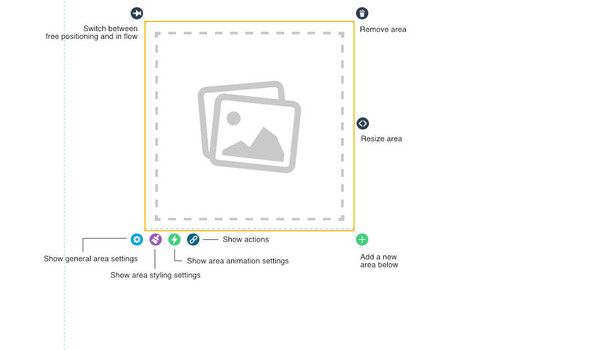
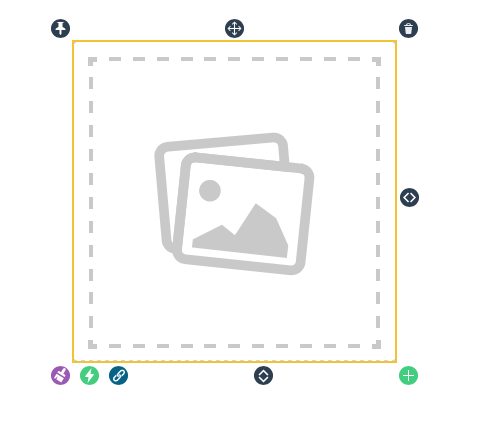
Clicking on an area selects it, which is indicated by a yellow border around it. Various buttons will appear along the border, the image below describes each button's function.
Free positioning / in flow
To freely position an area or section, click on the "pin" icon located at the top left corner of the area or section. This allows you to place it anywhere on the artboard. Click on the "pin" icon again to move the area back to its original inline position.
To move a freely positioned area or section, simply click and drag the handle above it to the desired location. To adjust the width of a freely positioned area or section, use the handle located on the right side of the area. The height of the area will automatically adjust to fit its content.
When to flow your areas or use free positioning
When an area is in flow, it is automatically placed below other areas that are also in flow. For example, if you have a block of text on a background picture, it makes sense to have a section that is freely positioned on the canvas. Within that section, you can add areas that are in flow, such as a headline area followed by a text area. This will ensure that the content flows seamlessly and is presented in the desired order.
 Exact positioning
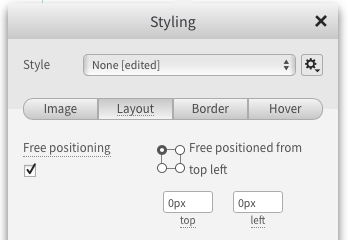
To manually adjust the position of an area or section, click on the styling button ( ) and select the "Position" tab. From there, you can adjust the number of pixels the area or section should be from the top and left side to achieve the desired placement.
Corner alignment
In addition to aligning an element with the top or left corner, you can xalso align it with another corner of the canvas. To align an element with the top-right, bottom-right, or bottom-left corner, simply click on the corresponding circle next to the "Free positioning" option. This will adjust the element's alignment to the selected corner.
Flexible width and height
To create elements with flexible width and/or height, you can enter values in opposing fields. For instance, if you enter "0px" in both the left and right fields, the element will always appear over the entire width of the article. This is particularly useful when designing for devices with varying screen sizes.
Area tree
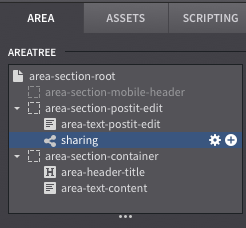 You can find the Area Tree in the right sidebar under the "General/Area" tab. The Area Tree displays all the sections and areas in the current article, and works similarly to the layers panel found in many professional graphics applications. The Area Tree is always visible, allowing you to easily manage and organize your content.
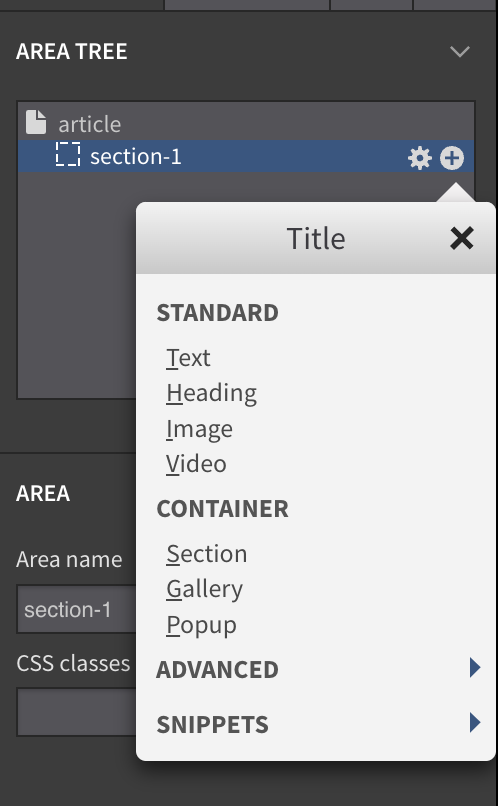
To select an area, simply click on it in the Area Tree. This will reveal two buttons on the right side of the screen. The Settings button provides a menu with various actions, such as copying, cutting, or deleting the selected area, or pasting a cut/copied one underneath. keyboard shortcuts are also available for these actions. The Plus button allows you to add new areas, such as images or sections, directly to the Area Tree.
How do I rename an area?
- Select the Area you want to give a name
- Navigate to the ‘Area Name’ field
- Input a descriptive name for the area. The area name will automatically be converted to use lowercase and underscores instead of spaces.
Snippets
You can create snippets, or in other terms: templates, of your areas. A snippet is an exact copy of one or more areas, thus it will contain all settings and content of the selected areas. Your snippets will be available in all your editions and articles contained in the same project.
An example of a situation in which you can use a snippet is when you want an element containing social sharing buttons. First you create the area as you want it, including the social sharing buttons and styling. After you have done this once you save it as a snippet which you can insert in other areas or articles.
How do I create a snippet?
- Select an area in the Area tree (right toolbar).
- Click on the cog icon .
- Click Save as Snippet
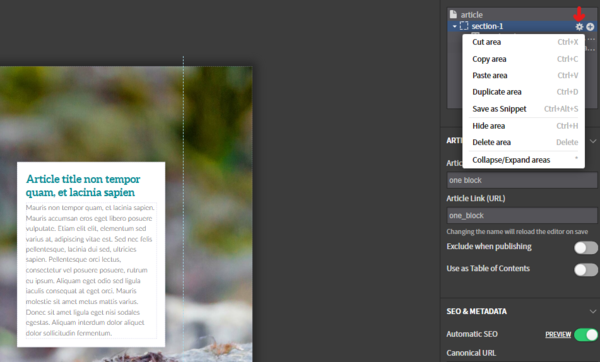
In the example above, we have created a snippet of the "white block with header and text" section. This snippet can now be placed anywhere in all editions of this project.
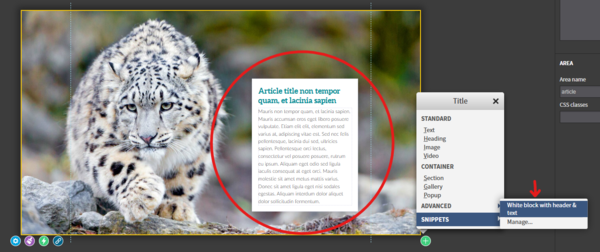
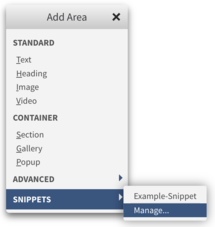
After adding your first Snippet it appears in the area picker, where you can rename or delete the available Snippets using Manage.
Common areas
These are the areas that you will find most useful when creating your publication. While they are typically placed in the content flow, they can also be freely positioned anywhere on the canvas.
Text Area
The text area is the bread 'n butter of your publication, allowing you to add rich text to your content. Use the integrated tool palette to style your text, or edit the HTML source if you prefer. You can also embed inline images using the integrated asset picker.
Image Area
The image area is perfect for placing images in your publication. Images added to the image area are automatically scaled to the full width of the available space and optimized for the reader's device, so you don't need to worry about uploading very high resolutions. H5mag accepts JPG, PNG, and SVG images.
Video Area
Use the video area to add videos to your publication. You can easily embed video content from YouTube and Vimeo, and customize the start and end time or add a poster frame. Simply copy the YouTube/Vimeo link or embed code into your video area to add a video.
Advanced areas
Advanced areas are a great way to create interactivity within your magazine. They are tuned to give a great experience on any device.
Advanced areas work the same as others, but are often dependent on external services from where you need to copy a link or embed code.